Migrating from a Shopify Store to Another Shopify Store
To start migrating or importing orders from another Shopify store, you'll first need to export your orders from Shopify. You can use Shopify's default export tool to do this. This is a pretty straightforward process.
Export Your Orders From Shopify
To export your data from Shopify, click the Orders menu option on the left navigation bar while you're logged into the Shopify admin. From here you should see an export button above your Orders table and right below the Orders heading.

This will bring up Shopify's export orders dialog. From here you'll want to click the All Orders radio button to tell Shopify to export all of the orders in your store. Make sure the CSV radio button option is also selected before you click the Export Orders button.

This will bring up a "save as" prompt and allow you to save the file to your computer. If you have a lot of orders the file may download as a zip file. You'll need to unzip this file before uploading it to EZ Importer.
For a more detailed description of how to export your orders from Shopify using their export tool click here.
Selecting a Default Template
Now that you have your CSV ready to import, you'll want to create a data mapping using our data mapping template system. Shopify has a standard CSV file, so we've created a default data mapping so you don't have manually map each column.
To select the Shopify default data mapping click the Data Mappings Template on the left navigation bar in EZ Importer. From here you'll see a list of our default data mapping templates. Click the blue Use Template button to the right of the Shopify CSV Export Mapping.

This will create a new data mapping and redirect you back to the home page where you can click the Import Orders button and start your import.
Importing Your Orders
Now that you have your data mapping created, you can import your orders with a few clicks. First click the Import Orders button. This will bring up the Import dialog. From here, create a name for your import, select the data mapping you just created and the file you're going to import.

Once you've selected everything you need, you're ready to review your import. Click the Review Import button and you'll be redirected to the Review Import page. Remember, if you have a very large file it may take a few minutes to upload. Once you've been redirected to the Review Import page, you can look at the file to ensure everything looks the way you want. Now you're ready to run your import. For more information about the Review Import page click here.
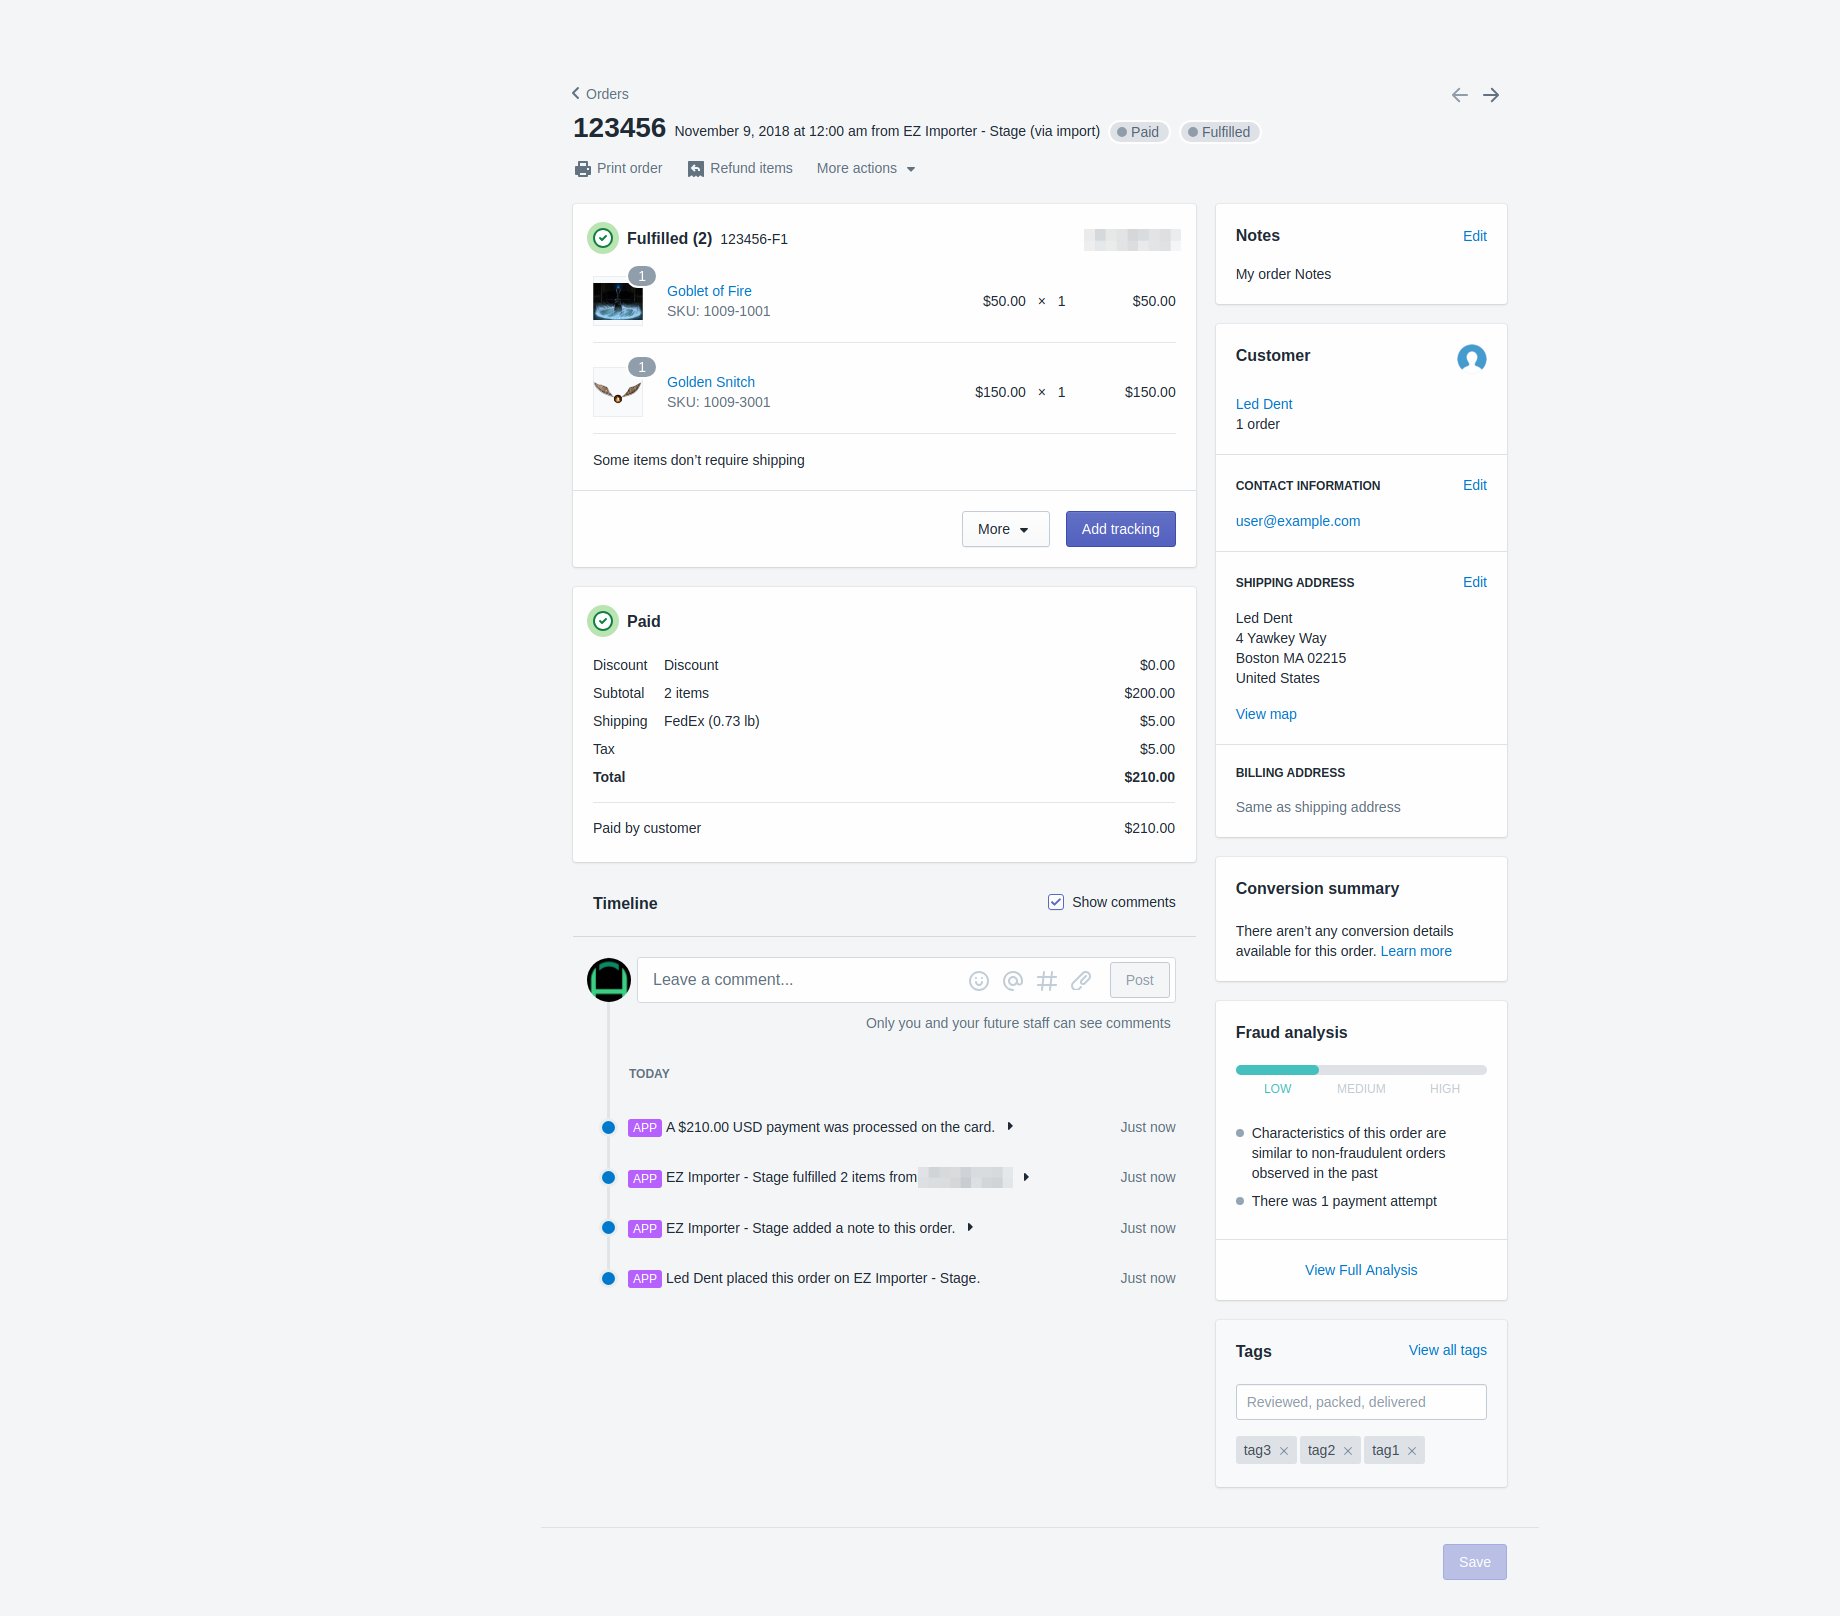
What's being Imported
When building the Shopify to Shopify Data Mapping Template we've mapped everything we could from the Shopify CSV file. This includes the following.
- Line Item information
- Order date
- Taxes
- Discount Codes (Line Item discounts coming soon!)
- Shipping Information
- Transactions
- Link By Product SKU (if your product SKU is setup in your store the line items will link to your products)
- Link to customer
You orders will now show up in your reports, analytics and be linked to your customer. This should give you everything you need on the Order when importing from another Shopify store.
If you have any other questions about how to import your Shopify CSV to another Shopify store feel free to let us know.
App: EZ Importer
Tags: shopify, ez importer, csv, migrations