Migrating from Squarespace to Shopify
To start migrating or importing orders from Squarespace, you'll first need to export your orders from Squarespace. You can use Squarespace's data migration tools to export your orders to CSV. To read their documentation on how to export your orders click here.
Selecting a Default Template
Now that you have your CSV ready to import, you'll want to create a data mapping using our data mapping template system. Squarespace has a standard CSV file, so we've created a default data mapping so you don't have manually map each column.
To select the Squarespace default data mapping click the Data Mappings Template on the left navigation bar in EZ Importer. From here you'll see a list of our default data mapping templates. Click the blue Use Template button to the right of the Squarespace Mapping.

This will create a new data mapping and redirect you to the edit data mapping page where you should review your data mapping to ensure the data you want imported is mapped correctly. For more information on why you need to edit the mapping before using it, click here.
Review Your Squarespace Data Mapping
The Squarespace Data Mapping Template is a starter template. Starter templates are meant to help you start your data mapping and need to be reviewed before you use them. Squarespace has a consistent export file but there are a few things you should review before doing your import.
The Squarespace Data Mapping Template is about 90% built for you, the majority of fields in the CSV file are mapped to the appropriate Shopify fields. Because you are migrating data from a separate system, there will never be an exact match and you'll need to verify or edit the mapping. The main field that's missing from the Squarespace export is the fulfillment status.
Mapping Your Fulfillment Status
The fulfillment status is populated in the Squarespace CSV file, however the field does not match Shopify. Shopify expects the fulfillment status field to be marked as fulfilled, partial or unfulfilled. In order to get this field to populate correctly, you'll have to update your CSV file. To do this, you can either update the fulfillment field in your CSV or you can add a new field and map it to the line_items.fulfillment_status field on the Line Items tab.
Once you've added the new Column in your CSV file, go back to the data mapping you just created and map the new field to the fulfillment_status field on the Line Items tab.

Once you've added your field name to the data mapping, make sure to click the checkbox to the left of the field.
You also may want to mark fulfilled orders archived. If this is the case, all you need to do is click the checkbox to the left of the closed_at field on the Order Details tab. We've pre-populated the field to map to the Fulfilled at field in the Squarespace CSV export. Click here to read more about archiving orders.
Then click the Update button on the bottom of the page.
Importing Your Orders
Now that you have your data mapping created, you can import your orders with a few clicks. First click the Import Orders button. This will bring up the Import dialog. From here, create a name for your import, select the data mapping you just created and the file you're going to import.

Once you've selected everything you need, you're ready to review your first import. Before running your full import we still recommend you run a few TESTS to ensure everything looks the way you expect. Click here to read our test documentation.
Click the Review Import button and you'll be redirected to the Review Import page. Remember, if you have a very large file it may take a few minutes to upload. Once you've been redirected to the Review Import page, you can look at the file to ensure everything looks the way you want. Now you're ready to run your import. For more information about the Review Import page click here.
What's Being Imported
When building the Squarespace Data Mapping Template we've mapped everything we could from the Squarespace CSV file. This includes the following.
- Line Item information
- Order date
- Taxes
- Discount Codes (Line Item discounts coming soon!)
- Shipping Information
- Transactions
- Link By Product SKU (if your product SKU is setup in your store the line items will link to your products)
- Link to customer
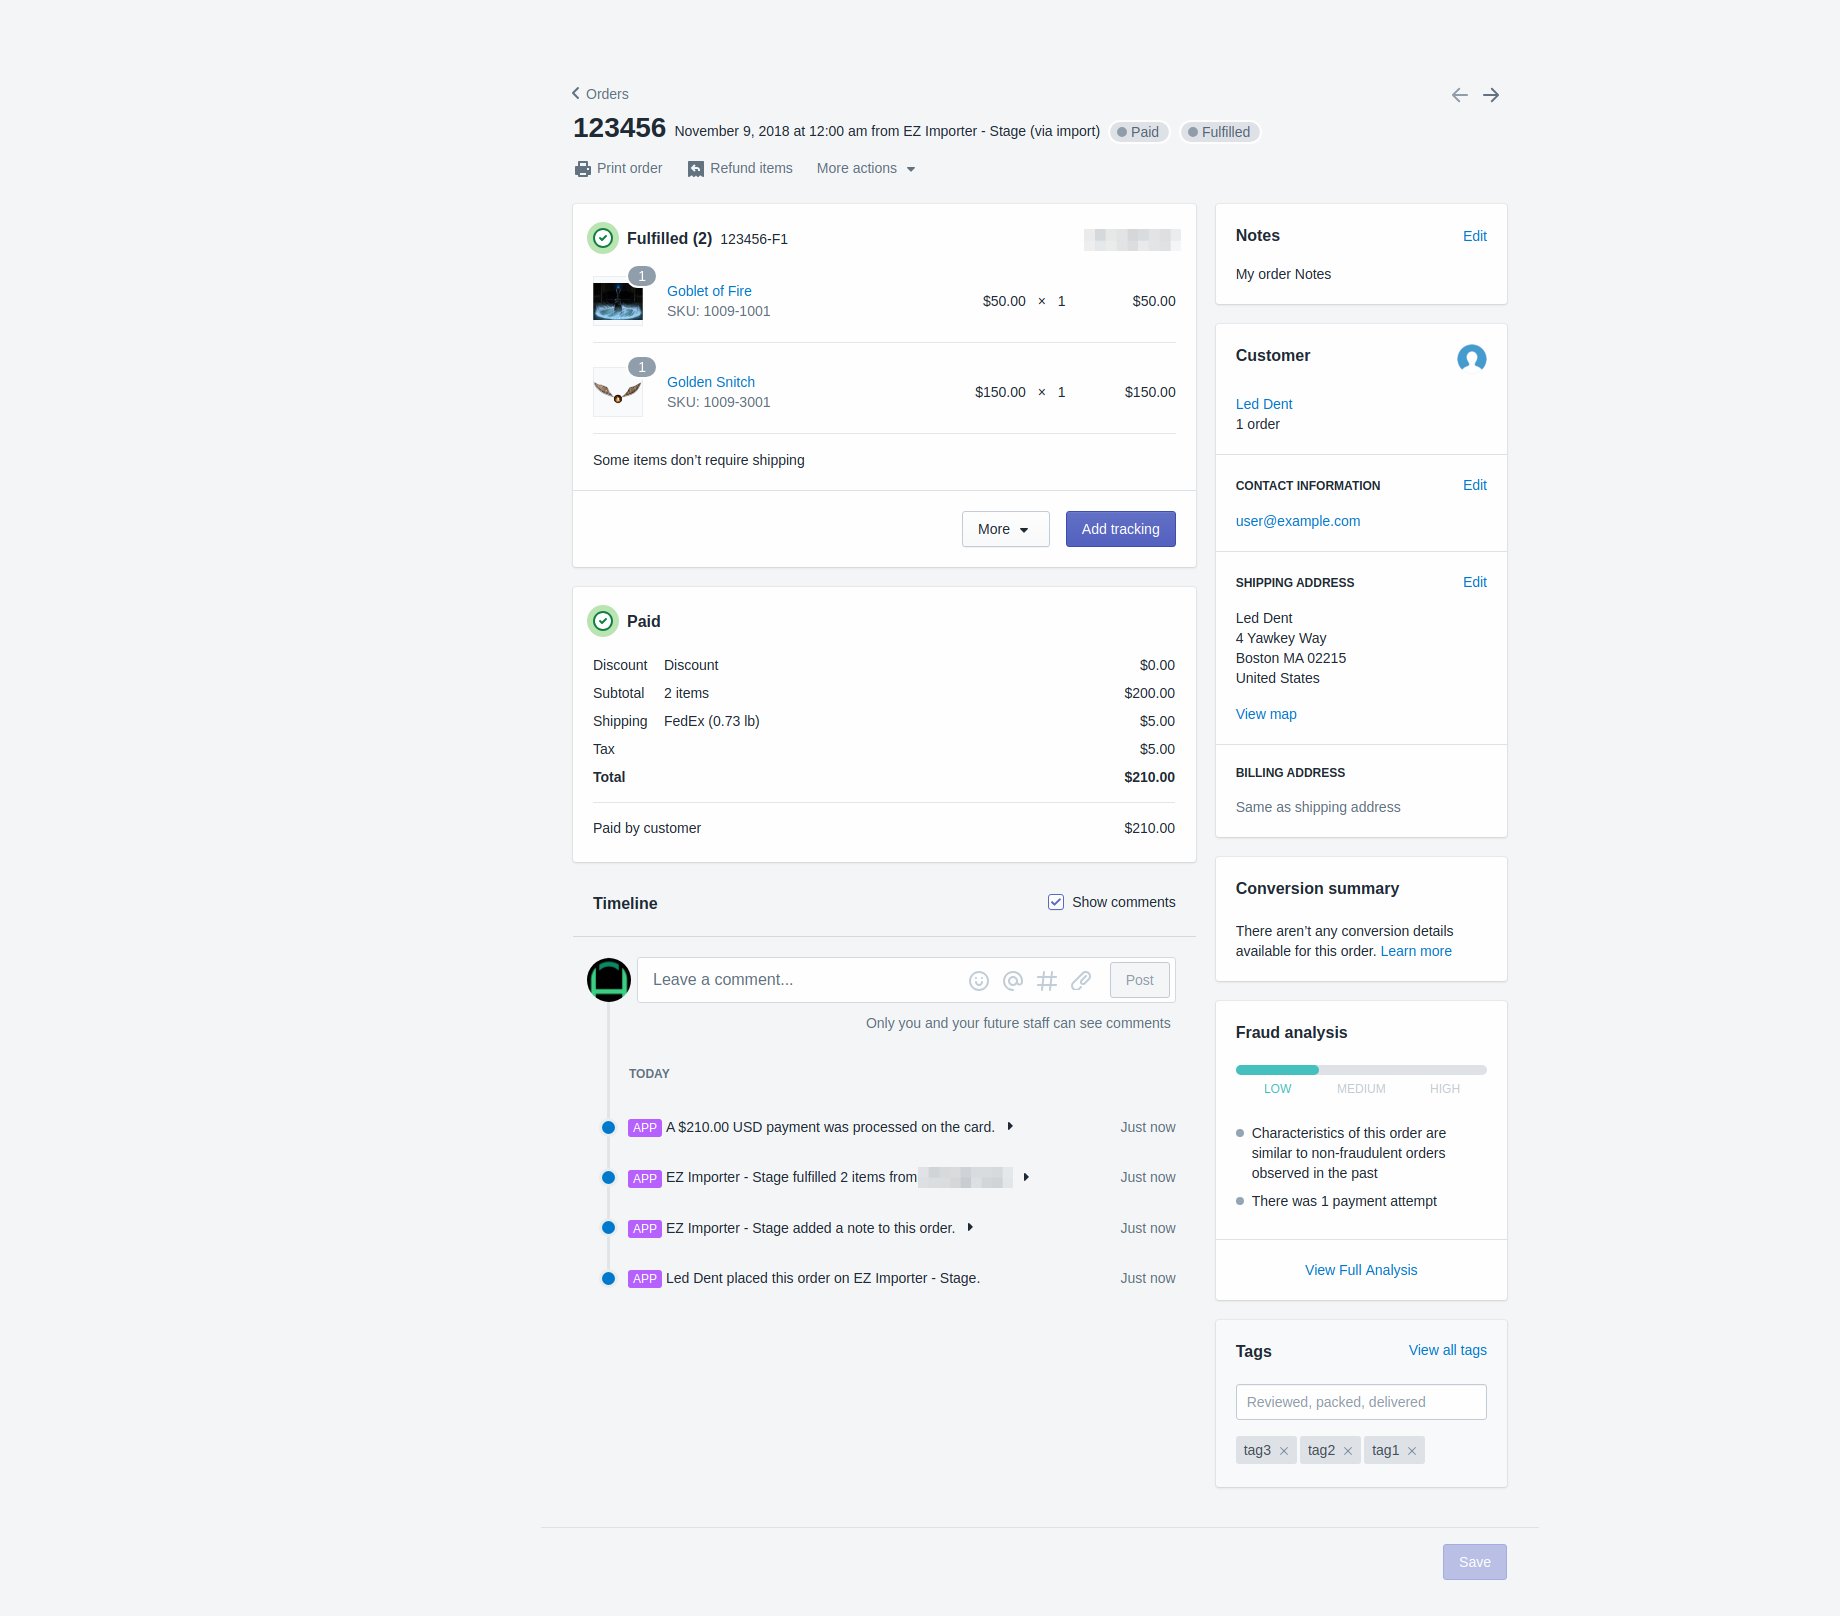
You orders will now show up in your reports, analytics and be linked to your customer. This should give you everything you need on the Order when importing from another Shopify store.
If you have any other questions about how to import your Squarespace CSV file feel free to let us know.
App: EZ Importer
Tags: migrations, csv, squarespace, ez importer, shopify