Quick Start Guide
Getting your data mapping just right can take some effort. To make it as easy as possible, we've put together this quick starter guide.
Contents
- Tutorials
- Templates
- CSV File Format
- Draft Orders
- Mapping Your File
- Test Before You Run Your Full Import
- Large Imports
- Additional Resources
Tutorials
The easiest way to learn how to use EZ Importer is by watching our tutorials. They're short 2-3 minute videos walking you through each part of the process. Click here to check them out!
Templates
To help you get started, we've created two types of templates; data mapping templates to help you import orders from another platform and CSV templates to help you import orders that you are manually curated.
- If you're importing orders from another Shopify store, we've got you covered. Simply click the Shopify CSV Exporter Mapping template to get started. Read our migration docs here.
- If you're importing orders from another E-Commerce platform or from a crowdfunding platform, we have some templates that can help. These templates are what we call starter templates and are set up to help you get started. You'll have to make some tweaks to the template before using it but it should save you boatloads of time.
- If you are looking for a CSV file template or manually adding orders to a CSV file you should look at our Downloadable CSV Templates. You can read about how they work here.
CSV File Format
EZ Importer doesn't have too many rules around your CSV file. Our data mapping system is flexible enough that it will allow you to format your CSV file any way you want. However, there are three rules your CSV file must follow:
- Your CSV file must have a header row at the top of the file. EZ Importer uses the header row to read the values in each column of your CSV file.
- Your CSV file must have an order number in the file. We use this number to help us match line items with orders. If your export does not have an order number, you can use a sequence as the order number, map it to the order number, and let Shopify generate the order number for you.
- Your CSV file MUST include line items in a separate row. If you have an order with multiple line items, the line items must be in a row with the same order numbers. For more information about this, click here.
Other than the above rules, you can label your columns whatever you want and use our data mapper to map them to the appropriate Shopify fields.
Draft Orders
With EZ Importer, you can import Draft Orders as well as regular Orders into your Shopify store. The process of importing draft orders is the same as that of regular orders; the main difference is with the Data Mapping.
Shopify has a different set of fields, and we have different configuration options for importing Draft Orders. If you intend on importing draft orders we recommend you read our Draft Order documentation before you continue with this guide.
Mapping Your File
If you can't use one of our default data mappings, you'll have to manually map your CSV file to the appropriate Shopify fields. Don't worry; this isn't very hard. The best way to do this is to upload a sample of your CSV file (one you'll be using to test) and select the Add Data Mapping option from the Import Orders dialog.

Clicking the Review Import button will bring you to the data mapping configuration page.

Here you'll need to map the fields you have in your CSV file to the appropriate Shopify fields. Shopify requires a small set of fields with each order. Everything else is optional. For more information on how the data mapping works, click here to read our documentation.
Below is a list of fields you may want to import.
- If you're importing historical orders and want the date the order was purchased to appear on the order, you'll need to map the process_at field on the Order Details tab. Read more here.
- You can import your own order numbers by using our Shopify will generate order number option. To fully understand how Shopify order numbers work, click here.
- By default, Shopify will mark your orders paid. If you need to import your orders with a different financial status, you'll need to map the financial_status field on the Order Details tab. The financial_status field allows a static set of values. The following values are allowed for this field pending, authorized, partially_paid, paid, partially_refunded, refunded, and voided.
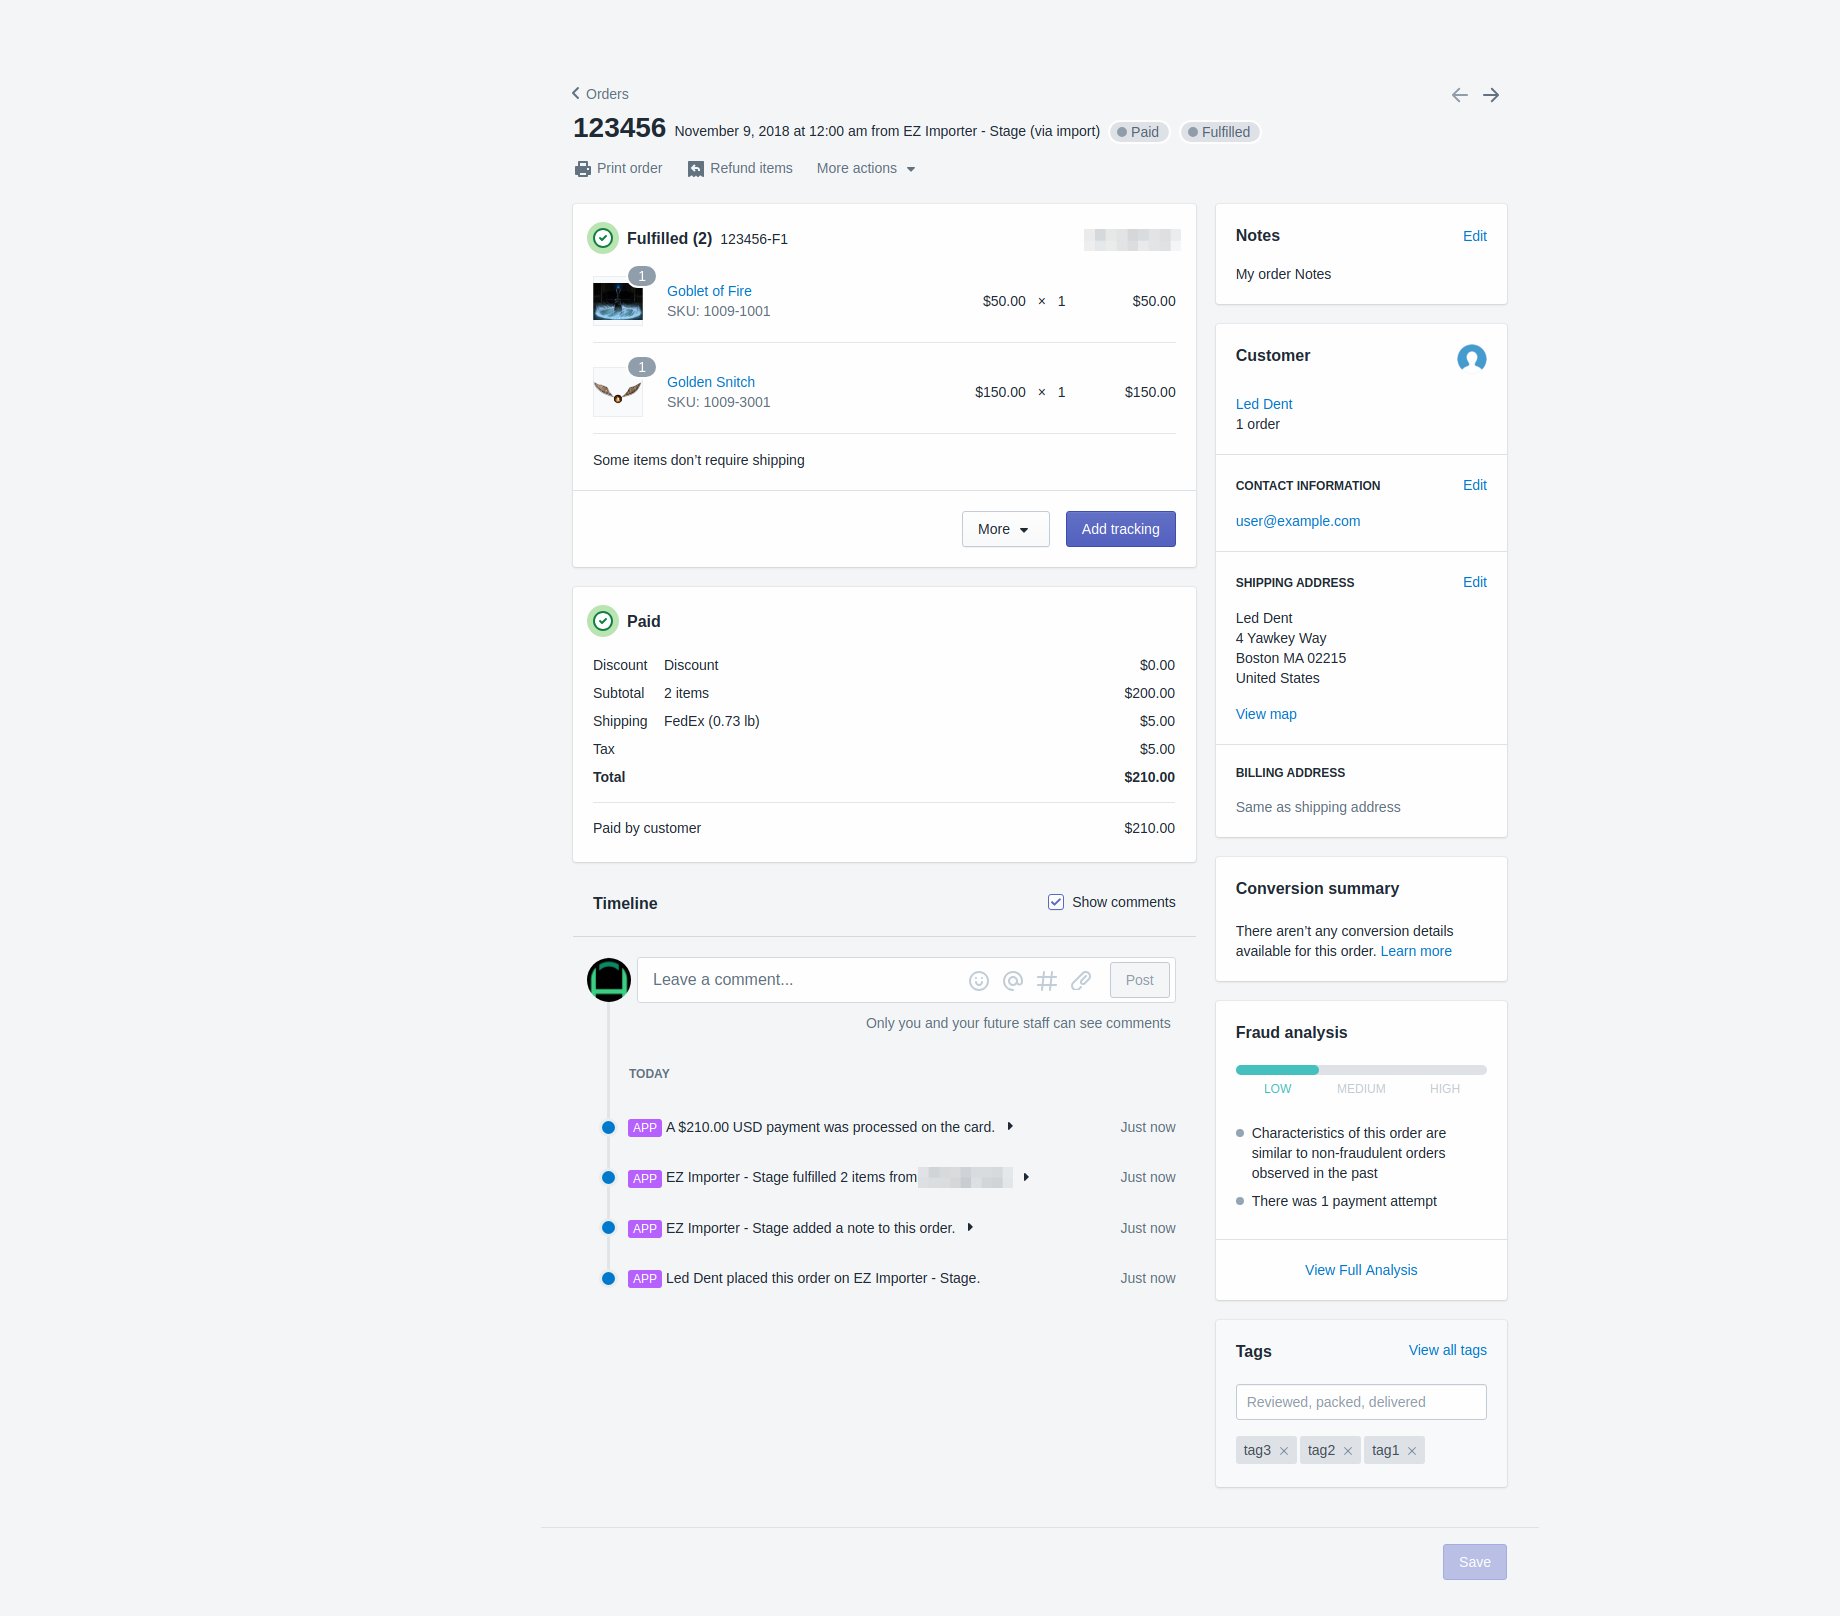
- By default, Shopify will mark all orders imported as unfulfilled. If you want your orders to be marked as fulfilled, you should map the fulfillment_status field on the Line Items tab. To mark an order fulfilled, make sure to add the value fulfilled to the column you've mapped to the fulfillment_status field in your CSV file.
- You can map your Discount Codes if they are in your CSV file.
- You can also map your Taxes if they are in your CSV file.
- If you want Shipping Information associated with your order, you can map the Shipping and Billing addresses.
- In order to have your Transaction data associated with your customer, you'll need to map your order total to the transactions.amount field.
- You can associate your products with your order if you have the Product SKU or barcode. Our Link By Product SKU or Barcode feature makes this easy.
- You can also link your orders to the customer who purchased them.
If you've mapped all the fields above, your orders will now show up in your reports and analytics and be linked to your customers.
You may not have all this information, which is okay. As we mentioned before, many of these fields are not required. We recommend you run a bunch of tests before you do your full import.
Test Before Running Your Full Import
Before running your full import, we recommend you run a few tests first. This allows you to look at the data in your Shopify admin, as well as the reports and analytics you care about. Read our testing documentation for more details.
Large Imports
If you need to do a large import (more than 50,000 line items), we recommend breaking your CSV file into multiple files. The recommended number of line items per CSV file is 25,000-50,000.
We recommend breaking your import into multiple files for two main reasons:
- The Shopify API usually takes 2 seconds per order, but we've seen it take up to 6 or 7 seconds. This means your import can run for hours. If you have had any data issues and need to delete an order after it's been imported, it will take longer the more orders you have in your import. Breaking the large file into multiple files will help you manage this.
- Data errors are bound to occur with large imports. Managing these errors is much easier when breaking the import into multiple files. Our customers have found it easier to handle errors in this way.
Remember to run tests before doing your full import, this will save you a ton of time as it will prevent you from finding data errors later in the process. For more information about large imports, click here.
If you have any other questions about importing a large number of orders, feel free to contact us.
Additional Resources
This should help you get started. We have a wealth of information here in our Knowledge Base. The best place to start is with our getting started list.
EZ Importer was built with both historical migrations and consistent imports in mind. We have many customers who've imported from other e-commerce platforms and customers who import daily, weekly, or monthly. Once you've created your data mapping, it can be reused on subsequent imports, so you don't have to go through the data mapping process again.
App: EZ Importer
Tags: shopify, ez importer, csv